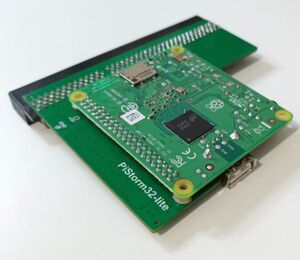
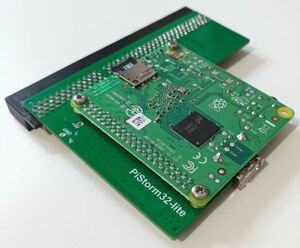
Pistorm32-Lite
Content Updated: 13/06/2024
Introduction
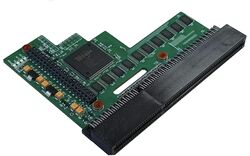
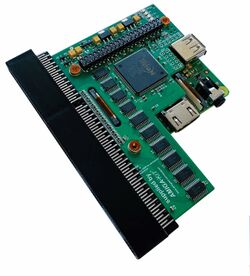
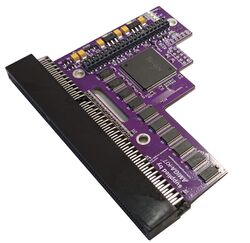
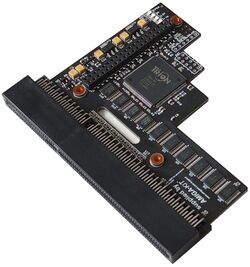
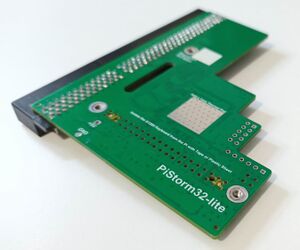
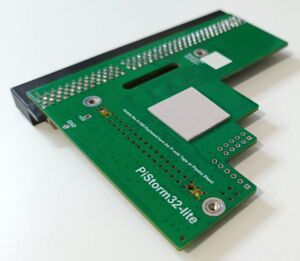
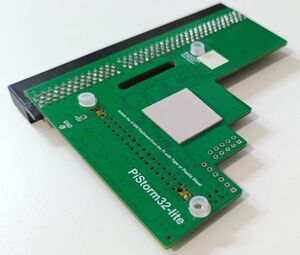
The PiStorm32-Lite is an accelerator for the Commodore Amiga 1200 computer. It has been created by Claude Schwarz.
This speeds up the Amiga 1200 by leveraging the Raspberry Pi's computational power. The Raspberry Pi plugs into the PiStorm and emulates the native 680x0 CPU at much higher performance than the original CPU.
The Raspberry Pi is running software emulation of the 680x0 CPU using Emu68 developed by Michal Schulz.
As a community project it is assembled and distributed by well known suppliers such as Amiga Kit.
Compatiblity
To use the PiStorm32-Lite you will require:
- Commodore Amiga 1200 (or Escom Amiga Technologies 1200)
- Raspberry Pi: (Where possible, 2GB Max is recommended as AmigaOS is limited to 2GB Fast RAM)
- Zero 2w
- Model 3 A
- Model 3 A+
- Model 3 B
- Model 3 B+
- Model 4
- CM4 (To use, you need CM4 breakout board for the PiStorm32-Lite board)
- MicroSD card (recommended 32GB)
Hardware Installation
Raspberry Pi Installation
Please follow the following steps for mounting and securing your Raspberry Pi on the PiStorm32-Lite:
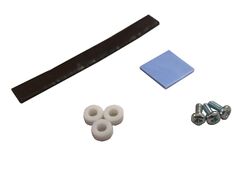
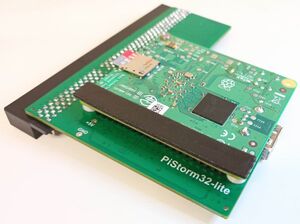
IMPORTANT: Covering the exposed GPIO pins on the PiStorm32-Lite board with the insulation strip is critical (see step 6 photograph). This prevents the pins shorting against the metal backplate of the Amiga 1200 keyboard.
Amiga 1200 Installation
1 Power down the Amiga and monitor. Unplug all cables from the Amiga.
2 Anti-statically discharge yourself before handling the device. It is recommended to use an E.S.D. wrist strap for the installation process (such as Amiga Kit product code TLSASW001).
3 Turn over the Amiga and remove the plastic trap door cover by using a small coin/flat blade screw driver to gently lever open the plastic latch.
4 Align the memory expansion's 150-pin expansion connector with the gold contacts on the motherboard and push it on until fully in place. Do not push the expansion onto the motherboard's gold contact at an angle as this could bend or damage the pins in the connector. If the metal upper RF shielding is obstructing the installation of the card, then it may need to be gently bent upwards. It can also be loosened by opening the computer and loosing the securing screw.
5 Replace trap door cover, turn over, connect all cables and power on.
Software Installation and Configuration
There are two ways you can setup software. First being the quick method to test card is working. The second being a more involved process to enable use of extra space on SD card, as Hard Disk Drives.
Quick Method
1) Take your SD card (preferably 32GB) and format it as FAT32.
2) Goto https://github.com/michalsc/Emu68/releases/tag/v1.0.4 and download latest available for PiStorm32-Lite. Current file is labled, Emu68-pistorm32lite.zip.
3) Once downloaded, extract contents to the root of the SD card.
4) Open root of SD card copy across a valid kickstart file across (i.e. Kickstart 3.1) and rename it kick.rom.
(If you do not wish to use kickstart file, make sure to # out the initfs line. i.e. # initramfs /roms/PS32-Lite_3221.rom, this is done in config file.)
5) Finally, insert SD card into Raspberry Pi. Once turned on, it should boot to onboard ROM screen (unless you have an HDD, else it will boot that). You can use official Kickstarts or Custom made roms.
- NOTE:- Do not do as config text says, in regards to adding firmware before kick.rom. Doing this causes Lite to load firmware twice and machine will hang on blank screen.
More Involved Method
1) Take your SD card, however this time we are going to clean it and partition it.
2) Open Command Prompt as Administrator, if using Windows (else use what ever partitioning software your happy with).
3) In command prompt type diskpart and press return (enter).
4) In diskpart type list disk and press return (enter). It will list all drives attached to your machine.
- NOTE:- DiskPart is a dangerous tool if you select wrong drive, as it will list your boot drives. Make sure you select the correct device.
5) Look at list and select correct drive by size and then type select disk y (y being number of drive listed in list disk) and press return (enter).
6) Once your sure you have correct drive selected (you can check with list disk, it will put and * next to drive selected), type clean and press return (enter). This will completely blank the SD card.
7) Check SD card is still selected, by using list disk command again (you will also notice, free and total space will be same).
8) Now type create partition pri size=512 and press return (enter). This partition will be our PS32-Lite FAT32 software partition. It doesn’t need to be massive, so 512MB should surfice. 9) Next you need to decide on drive sizes for rest of card. As any extra partitions created will be seen as separate drives. So you could create 1 partition using rest of card and then partition that in AmigaOS, like a real HDD. For this guide we will create 3 extra partitions.
10) Now type create partition pri size=512 id=76 and press return (enter). This can be our system drive in AmigaOS.
11) Then type create partition pri size=512 id=76 and press return (enter). This can be our Work drive in AmigaOS.
12) Finally type create partition pri id=76 and press return (enter). Notice we do not specify a size, this will use the rest of the SD card. This can be our Games drive in AmigaOS.
13) Now we need to assign partition 1, so it will mount as a drive in windows. Type select partition 1 and press return (enter). Then type assign and press return (enter). Then type exit and press return (enter).
14) You can now close the command prompt window.
- NOTE:- To use partitions we just setup as drive in AmigaOS. You will need to change the HDToolBox tooltype line. Change from SCSI_DEVICE_NAME=scsi.device to SCSI_DEVICE_NAME=brcm-sdhc.device.
***(For Pi4 / CM4), you need to use SCSI_DEVICE_NAME=brcm-emmc.device.***
When you run HDToolBox, ignore the disk marked as 0, as that’s our Pi software partition. Set up disk 1,2 and 3 as you normally would a HDD.
15) Copy PS32-Lite files across as described in Quick Method.
Note: You can now also setup SD HDD using a new tool called Emu68 Imager. Details and downloads can be found at https://mja65.github.io/Emu68-Imager.
Extra Configuration Information
In the main config.txt, you only need to point it to your kickstart rom file. If you want to use the onboard kickstart simply comment line "initramfs kick.rom" with # at the beginning.
You can also ceate another text file named "cmdline.txt". This file will pass more configuration options, as listed below.
Current commands are;
brcm-sdhc.device
   sd.verbose=0 | 1 | 2
   Adjust verbosity of the driver. Value 0 is default one and it shuts off debug nearly completely. Value 1 gives some more details from the driver,
   whereas value 2 should be used only for debugging purposes since it reports every single BeginIO call.

   sd.unit0=off | ro | rw
   Change the behaviour of sdhc-brcm.device unit 0. Default value is ro which means the unit is not hidden, but cannot be written to. Changing the
   value to off disables the unit 0 completely whereas rw allows one to write data to it. Use with care, as Unit 0 of the device represents the entire
   card, including partition table and FAT32 boot partition.

   sd.low_speed
   Disables 50 MHz clock even if the microSD card reports that the clock is supported. Setting this option disables SD card overclocking (see subsequent option).

   sd.clock=num
   Selects the clock speed in MHz which will be switched on instead of default 50 MHz if the card supports the high-speed mode. The option has no effect if
   sd.low_speed was also applied.
brcm-emmc.device
The same set of options as in case of brcm-sdhc.device. Replace sd with emmc prefix in this case.
68040.library
   vbr_move
   Moves VBR (base address for exception vector table) from CHIP to FAST ram. This setting improves the performance slightly, since the FAST ram on Emu68
   is at least 500 times faster than CHIP, but reduces compatibility with old games and demos started from floppy drive drastically. However,
   system-friendly software as well as demos and games started through WHDLoad should not be affected.
emu68-vc4.card
   vc4.mem=num
   Sets size of VC4 memory reported to P96 subsystem to num MB. Default is 16 in case of PiStorm build and 0 in all other Emu68 variants. Please note
   this is not the same as gpu_mem setting in config.txt file. The latter is used to assign general purpose memory to the VPU.
PiStorm32-lite only
   one_slot
   Forces a one-slot pistorm32 protocol resulting in slower write accesses to chipset and to CHIP memory
Debugging
   debug
   Enables debugging of the JIT engine. Every portion of m68k code translated to AArch64 will be shown in form of short statistics and binary dump of
   ARM code. Statistics include number of m68k instructions translated, resulting number of ARM instructions, mean ARM instruction number per m68k
   opcode and CRC32 checksum of translated memory block.

   disassemble
   Shows disassembled blocks in two columns. The left column contains m68k code disassembly whereas the right column is the AArch64 code. The two
   are aligned vertically so that the translated code can be assigned to every single m68k opcode properly.

   async_log
   Use asynchronous log on separate ARM core with a 8 MB large ring buffer. Improves performance of m68k when debug is enabled.

   fast_serial
   Use synchronous serial port running at a speed varying between 10 and 50 MBit instead of regular serial protocol at 921.6 kBit. Requires proper
   hardware such as e.g. FT232H.

   buptest=num
   When Emu68 is starting it will perform a bus test of the PiStorm interface. A num kilobytes of CHIP memory will be written with random patterns
   and subsequently will be read in many different ways with varying read sizes and data alignment. In case of error, which indicates some issues
   with PiStorm interface or connection to the Amiga, the test will stop and Emu68 will not start.

   bupiter=num
   Sets the number of iterations (of different randomised data patterns) of the bus test mentioned above.
Memory
   limit_2g
   Limit the mapped ARM memory to two gigabytes. Useful on machines which offer more RAM and, because of that, confuse e.g. AmigaOS.

   enable_c0_slow
   Enables “slow” memory in 0xc00000...0xc7ffff range.

   enable_c8_slow
   Enables “slow” memory in 0xc80000...0xcfffff range. Requires enable_c0_slow.

   enable_d0_slow
   Enables “slow” memory in 0xd00000...0xd7ffff range. Requires enable_c0_slow and enable_c8_slow activated.

   move_slow_to_chip
   Maps 512K memory expansion of A500 to the CHIP ram range.

   z2_ram_size=0 | 1 | 2 | 4 | 8
   Set size of Zorro II RAM expansion to 0 to 8 MB. Default is 8, but eventually has to be lowered if other Zorro II devices are installed
   in the system.
   z3_disable
   Completely disable all Zorro3 devices. (microSD, unicam, device tree functionality, and other Emu68 features)
Miscellaneous
   chip_slowdown
   Every translated m68k opcode will have additional ARM instruction reading the opcode word from memory before executing it. Can improve
   compatibility of old software using busy loops for delay purposes.

   cs_dist=1..8
   Adjust the distance between chip slowdown instructions. This option has effect only when chip_slowdown is active, either by cmdline.txt
   or enabled with EmuControl tool. For a number n specified here the slowdown applies to every n-th instruction, only.

   checksum_rom
   Recalculates checksum of mapped rom. Might be useful in case of modded kickstart files with broken checksum.
   copy_rom=256 | 512 | 1024 | 2048
   When Emu68 is starting the original Amiga ROM installed in your computer will be copied to fast ARM memory. The number determines size
   of the ROM image (in KB) which should be copied.

   enable_cache
   Turns on JIT cache in CACR register on startup. Useful in case of bare metal software started instead of AROS or AmigaOS ROM.

   fast_page_zero
   When fast_page_zero option in cmdline.txt is given, the first 4K of RAM will be mapped to ARM memory. This can slightly improve
   performance when moving VBR to FastRAM is not an option.
   Blitwait
   The BlitWait option allows the user to force Emu68 to do more fine-grained waits before writting several blitter-sensitive registers.
   Normally, the software which is using blitter should wait until it completed the operation, but in some cases the demo coders assumed
   that m68k is slow enough to not waist time for waiting. Such games and/or demos require the blitwait option activated either through
   cmdline.txt or with help of EmuControl to operate properly. Cmdline.txt line = BW.
   DBF
   User can pass the EmuControl command line options, like e.g. DBF ICNT=1 CCRD=0 directly to cmdline.txt file and thus making them global.
   This, in combination with eventually disabled CPU caches, allows one to run demos like the "State of the Art" directly from floppy,
   without WHDLoad.

   ICNT=n - Sets maximal number of m68k instructions generated per translation unit to n (1..256)
   CCRD=n - Sets the scan length of condition code flags optimizer to n instructions in advance (0..31)
   IRNG=n - Sets inlining range to value n (0..65535)
   dbf_slowdown
   A special hack is added to make DBF busy loops in form of:
   move.w  #delay, Dn
   loop:   dbf     Dn, loop
   operating with reasonable speed. Until now such kind of loops was way to fast on Emu68 and this rendered many old games or demos
   unusable or misbehaving.
   nofpu
   Disables the FPU unit of Emu68. All LineF opcodes related to FPU will trigger the exception.
   swap_df0_with_df1
   Swaps DF0 with DF1 floppy drive.

   swap_df0_with_df2
   Swaps DF0 with DF2 floppy drive.

   swap_df0_with_df3
   Swaps DF0 with DF3 floppy drive.
All commands, need to be in single line with one space between then, i.e. buptest=512 bupiter=1 sd.unit0=rw sd.clock=100 vbr_move enable_cache
Source of commands can be found at https://michalsc.github.io/Emu68/Options.html.
Emu68 Tools
These tools compliment Emu68. It contains things like RTG driver, Wifi driver, etc etc.
Contents
1) Buddhabrot (Fractal Generator)
2) Contirbutions (Emu68Info and Emu68 reset)
3) Emu68-Wifi (Wifi driver)
4) EmuControl (Allows on the fly changing of PiSTORM config)
5) I2C (Lets you set clock, if you have an I2C port clock attached)
6) LatticeI2CProg
7) ListDeviceTree (Lets you see the Pi devices on Amiga side)
8) SmallPT (Global Illumination)
9) VC4Tweak (Allows on the fly changing of RTG driver config)
Updates for Emu68-Tools can be found at https://github.com/michalsc/Emu68-tools/releases/tag/nightly.
Mounting PS32-Lite Emu68 Partition within Workbench
As most of us already have crossdos and FAT32 filesystems, we can add a mount script to mount the First partition of the SD.
Means you can update the Emu68 files and edit config files, without the need for another computer.
Zip file can be downloaded here; https://wiki.amiga.org/SD_Mount_Script.zip. Original script obtained via PiSTORM discord here; https://discord.gg/Dv3eaZnP
Unpack zip file on your amiga, then place PS32_Drive file in your DEVS:DosDrivers Drawer.
Depending on your Pi, you may need to alter Icon ToolTypes. For Pi3 it should be DEVICE=brcm-sdhc.device, for Pi4/CM4 it should be DEVICE=brcm-emmc.device.
Once done, reboot and it should show on Workbench screen. However, it will be in read only mode until you edit your cmdline.txt file and add emmc.unit0=rw
WHDLoad Wrapper
WHDLoad Wrapper is a modified version of WHDLoad, that uses a constantly updated database. When WHDLoad Wrapper is run, it checks the game being run against the database.
This tells WHDLoad Wrapper which settings work best for game. It then alters the Emu68 config on the fly.
If you are connected to internet, it will pause for around 5 secs, while it checks for game database update.
Version 0.11 can be downloaded here; http://tinyurl.com/bdhuz3ts. Updates can be obtained via PiSTORM discord here; https://discord.gg/Dv3eaZnP
Where to buy
This product can be purchased at the following Amiga Stores
Amiga Kit Amiga Store:
PiStorm32-Lite for Commodore Amiga 1200
Amiga Kit France Amiga Store: PiStorm
Amiga Store: PiStorm32-Lite for Commodore Amiga 1200
Copyright
This document including all images is Copyright 2024 AmigaKit Ltd. No unauthorised duplication or reproduction in any form is permitted.
