Difference between revisions of "Enhancer Software"
| Line 18: | Line 18: | ||
|} | |} | ||
</center> | </center> | ||
| + | |||
| + | |||
| + | == Releases == | ||
| + | |||
| + | The following releases of the Enhancer Software have been made: | ||
| + | |||
| + | === Current === | ||
| + | |||
| + | Version 1.0 released on 1st May 2016 for AmigaOS4 platform. | ||
| + | |||
| + | === Historic === | ||
| + | |||
| + | There are no historic releases. | ||
| + | |||
| + | |||
== Contents == | == Contents == | ||
Revision as of 22:09, 13 June 2016
Introduction
Releases
The following releases of the Enhancer Software have been made:
Current
Version 1.0 released on 1st May 2016 for AmigaOS4 platform.
Historic
There are no historic releases.
Contents
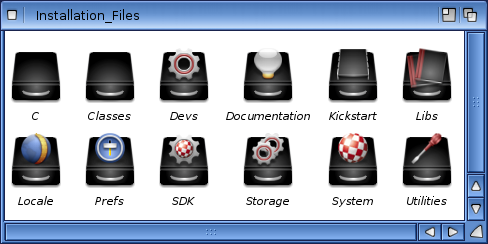
These components which are installed across the system as follows:
|
C
|
Prefs:
|
Installation
Please read these important notes before installing the Enhancer Software on your hard disk drive.
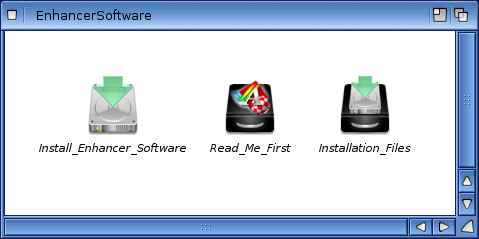
To install the Enhancer Software to your system, please double click the Install_Enhancer_Software icon as shown below:
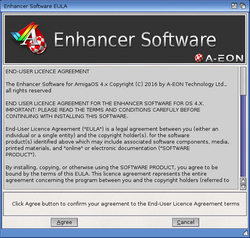
The End-User Licence Agreement will be displayed which needs to be reviewed. If you agree to the terms, then click the Agree button to continue to the main Installation of the software.
The Installation will then ask you if you wish to backup any files that could be overwritten by the Enhancer Software Installation process. It is recommended that you select Yes. If you do this, once you press Proceed button, you will then be asked the location to store on your hard disk where the files will be backed up to.
There are two icon drawer sets available to install for selected Utilities and Commodities. The standard blue icon set mimics the default look of OS4.1 drawers. Alternatively the black icon set introduces the new icon style that the Enhancer Software uses. The installation process will prompt you to choose the icon set you want to use.
The components of the Enhancer Software sections are installed in this order:
1. Gadgets, Classes and Datatypes:
   InfoWindow Class - used by ClipViewer, Exchanger, MultiViewer, MultiEdit, X-Dock
   OptionButton Gadget Class
   PieChart Gadget Class - used by Format
   ProgressBar Gadget Class - used by TuneNet and X-Dock
   Shared Image Class - required by ClipViewer and MultiViewer
   SimpleHTML Datatype - used by MultiViewer
2. Utilities:
   AmiDVD
   CANDI and CANDI Preferences ¹
   InfoWindow
   MultiEdit ¹
   MultiViewer ¹
   PartitionWizard
   TuneNet
   X-Dock
3. Commodities:
   ClipViewer ¹
   Exchanger ¹
4. System:
   Format
   NotificationServer and Notification Preferences
5. Drivers and FileSystem:
   Diskcache Library
   RadeonHD v1
   SmartFileSystem 2
   Warp3D Nova
6. CLI Commands and Tools:
RequestChooser
¹ Some components from the Enhancer Software will install the image data they require for their User Interface in the Prefs/Presets drawer of your system partition. it is recommended not to change this, however, some more experienced users may want to install this data in an alternative location on their hard disks. If this is the case, you can change the default location from Presets to another bespoke location on your hard disk drive.
| Documentation
By default, all documentation for the components of the Enhancer Software are stored in the Documentation drawer of your system partition. There are options to install the documentation to an alternative location of your choice. | |
| Software Development Kit (SDK)
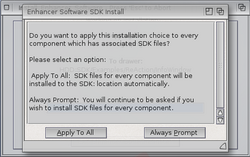
If you are a developer and have the SDK installed on your system, then any components with SDK files available can be optionally installed. | |
| Catalog Language Files
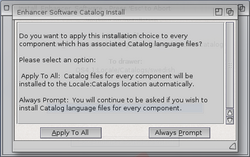
A lot of the Enhancer Software components have support for various languages. These Catalog files can be optionally installed wherever available. |
For both the SDK and Catalog language files, there is an option to skip the prompt and let the installer automatically remember your choices. The first time the SDK or Catalog Language files prompt appears, a requester window will ask if you wish to apply the installation choice to every supported component in the Enhancer Software. Click the Apply To All button to do this. Alternatively if you wish to continue to receive prompts, then click the Always Prompt button.
At the end of the installation, a message will report how many installed components need a "soft" or "hard" reboot of your system. The installed components that require a "soft" reboot either start from the WBStartUp or require an assign in your system's s/user-startup file. The components that require a "hard" reboot may need adding to the system's Kickstart/Kicklayout file and are activated during the initialisation of the Kickstart.
